
How to Match Wall Texture on a Drywall Repair
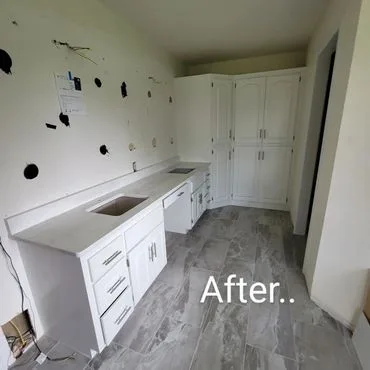
You've patched the hole perfectly, applied three coats of mud, and sanded it smooth. Then you step back and realize: the repair is obvious because the texture doesn't match. Here's how to fix that.
Identifying Your Wall Texture
Common Residential Textures
Orange Peel
- Looks like the skin of an orange
- Small, rounded-sm bumps
- Very common in homes built 1980s-present
- Created with spray equipment
Knockdown
- Flattened splatter pattern
- Irregular flat spots with texture between
- Popular in 1990s-2000s construction
- Created by spraying then flattening
Skip Trowel
- Hand-applied curved patterns
- Mediterranean or Spanish style
- Varies widely based on applicator
- More common in Southwest, less in Minnesota
Smooth
- No texture at all
- Shows every imperfection
- Common in older homes and high-end new construction
- Requires Level 5 drywall finish
Popcorn/Acoustic
- Bumpy, cottage cheese appearance
- Common on ceilings 1950s-1980s
- May contain asbestos (pre-1980)
- Difficult to match, often removed instead
Stomp/Slap Brush
- Repeating pattern from brush or roller
- Various patterns possible
- Hand-applied technique
- Matching requires same tool
Tools for Texture Matching
For Spray Textures (Orange Peel, Knockdown)
- Aerosol texture cans: Hardware store option for small repairs
- Hopper gun: Attaches to air compressor for larger areas
- Air compressor: 2-3 CFM minimum for hopper work
- Knockdown knife: 18-24" flexible blade for knockdown finish
- Practice material: Cardboard or scrap drywall
For Hand-Applied Textures
- Drywall mud: All-purpose joint compound
- Texture brushes: Stomp brushes, stipple brushes
- Trowels: Various sizes for skip trowel
- Rollers: Specialty texture rollers
- Spray bottle: For keeping mud workable
Matching Orange Peel Texture
Using Aerosol Cans (Small Repairs)
-
Prime the repair: Bare mud absorbs differently than surrounding paint
-
Shake can thoroughly: 2-3 minutes of shaking
-
Test on cardboard: Match existing texture before touching wall
-
Adjust nozzle: Most cans have adjustable spray patterns
-
Apply from correct distance: Usually 12-18 inches
-
Build gradually: Light coats, let dry, add more if needed
-
Feather edges: Overlap onto existing texture slightly
Using Hopper Gun (Larger Areas)
-
Mix mud to proper consistency: Like thick pancake batter
-
Adjust gun settings: Air pressure and nozzle opening
-
Practice extensively: Get pattern matching before wall application
-
Apply evenly: Consistent distance and speed
-
Prime and paint: After texture dries completely
Matching Knockdown Texture
The Process
-
Apply orange peel texture first: Same techniques as above
-
Wait for proper set time: Mud should be firm but not dry (10-20 minutes depending on conditions)
-
Test readiness: Texture shouldn't stick to knockdown knife
-
Knock down gently: Light pressure, single pass
-
Match surrounding pattern: Observe how flat/how textured original is
-
Clean knife frequently: Buildup changes the pattern
Common Knockdown Mistakes
- Knocking down too soon: Texture smears instead of flattening
- Waiting too long: Texture tears or won't flatten
- Too much pressure: Creates smooth spots
- Multiple passes: Overworks the texture
Matching Hand-Applied Textures
Skip Trowel
- Thin mud slightly: Easier to work
- Apply with curved strokes: Mimic existing pattern
- Study original carefully: Direction, thickness, randomness
- Work small sections: Blend into existing
Stomp/Slap Brush
- Find matching brush: May need to buy specialty tool
- Apply thin mud layer: To area being textured
- Stomp consistently: Same pressure, same technique
- Match pattern density: More or fewer stomps per area
The Popcorn Problem
Why Popcorn Is Hard to Match
- Original material often unavailable
- May contain asbestos (professional testing recommended)
- Texture varies significantly
- Repairs often visible
Options for Popcorn Ceilings
- Aerosol popcorn texture: Works for small patches
- Remove texture entirely: Often best long-term solution
- Cover with new drywall: Encapsulates old texture
- Skim coat entire ceiling: Creates new smooth surface
Asbestos warning: Homes built before 1980 may have asbestos in popcorn ceilings. Test before disturbing.
Texture Matching Advice for Twin Cities Homeowners
Minnesota's climate creates texture-repair challenges you won't find in generic guides:
- Winter humidity swings: Twin Cities indoor humidity often drops below 20% in January. Drywall mud dries fast and can flash (dry with a dull sheen) before you knock it down. In winter, cut your knockdown wait time by 3–5 minutes and mist the patch lightly with a spray bottle if the mud skins over too quickly.
- Summer humidity: In July and August, mud can take twice as long to set. Running a dehumidifier or your AC in the work room prevents smeared knockdown passes.
- Seasonal cracking: Minnesota's 120-degree annual temperature swing causes new stress cracks every year, especially over doorways and along ceiling-wall joints in older Shoreview, White Bear Lake, and Maplewood ramblers and split-levels. Use mesh tape and setting-type compound (hot mud) on recurring cracks—paper tape and pre-mixed mud often re-crack within one heating season.
- Era-specific textures: Twin Cities homes built between 1960 and 1985 (common in Roseville, Oakdale, and first-ring suburbs) frequently have heavy slap-brush or popcorn ceilings. Many pre-1980 ceilings should be tested for asbestos before any scraping or sanding.
- Cold-room repairs: Patching walls in unheated garages, porches, or three-season rooms? Keep the space above 55°F for 24 hours after mudding—cold compound cures chalky and won't hold texture.
- Ice-dam and leak repairs: After a winter roof leak, let the ceiling dry fully (often 2–3 weeks with fans) before texturing, and seal any water stain with a shellac-based primer or it will bleed through your new texture and paint.
Pro Tips for Invisible Repairs
Blending Techniques
- Extend texture beyond repair: Don't stop exactly at patch edge
- Feather into existing: Gradual transition hides seams
- Prime everything: Same absorption = same appearance
- Paint larger area: Don't just paint the patch
Lighting Matters
- Work with similar lighting: To what room normally has
- Check from multiple angles: Texture shows differently
- Use work lights: To spot imperfections before painting
When Matching Is Impossible
- Retexture entire wall (corner to corner)
- Retexture entire ceiling
- Remove all texture and go smooth
- Accept visible repair for hidden areas
Practice Before the Real Thing
- Buy scrap drywall pieces
- Practice texture technique extensively
- Match your specific wall before attempting repair
- Aerosol cans have limited spray time—practice is essential
Quick Texture Identification Chart
Not sure which texture you're matching? Compare your wall against this chart before you buy supplies:
| Texture | What It Looks Like | Common In | Best Tool to Match It |
|---|---|---|---|
| Orange Peel | Fine, rounded bumps like citrus skin | Homes built 1980s–present | Aerosol can or hopper gun |
| Knockdown | Flattened islands with texture between | 1990s–2000s construction | Hopper gun + 18–24" knockdown knife |
| Skip Trowel | Curved, hand-applied swoops | Custom and older homes | Trowel + thinned joint compound |
| Slap/Stomp Brush | Repeating starburst or stipple pattern | 1960s–1985 Twin Cities homes | Matching stomp brush |
| Popcorn (Acoustic) | Bumpy, cottage-cheese ceiling texture | Ceilings 1950s–1980s | Aerosol popcorn texture (test for asbestos pre-1980) |
| Smooth | Flat, no visible texture | Older and high-end homes | Level 5 skim coat — no texture tool |
Pro tip: Snap a photo of your wall with your phone flash held at a low angle. Raking light exaggerates the pattern and makes identification much easier than looking straight on.
Not sure you want to DIY it? Texture matching is one of the hardest repairs to make invisible. Schedule a free estimate — most texture repairs are quoted within 24 hours.
Troubleshooting: Why Your Texture Repair Stands Out
Why does my patch look smoother than the surrounding wall?
Your texture coat was too thin, your mud was over-thinned, or you sanded after texturing. Orange peel and knockdown need enough material to form peaks. Apply a second light pass, let it dry fully, and resist the urge to sand cured texture—sand only the flat mud around it.
Why is my knockdown smearing instead of flattening?
The mud is too wet. Wait another 5–10 minutes and test a corner with the knife. In humid Twin Cities summers this can take 25–30 minutes; in dry winter air it can be ready in under 10. The texture should not stick to a clean knife.
Why does the repair flash or look shiny after painting?
Bare joint compound absorbs primer differently than painted wall, so the patch sheen stands out even when the texture matches. Always spot-prime the patch, then prime and paint the entire wall corner-to-corner—not just the repair.
Why can I still see the outline of my patch?
The texture stopped too abruptly at the repair edge. Feather your spray 6–12 inches beyond the patch onto the existing texture so the transition is gradual. A hard ring of new texture reads as a halo in normal room lighting.
Why does my aerosol texture look different from the wall?
Nozzle setting, can distance, or shaking time is off. Shake for a full 2–3 minutes, test on cardboard at 12–18 inches, and adjust the nozzle until the test spray matches your wall's bump size before touching the repair.
Matching Texture on a Drywall Repair: FAQs
How do you match texture on a drywall repair?
Identify the texture first (orange peel, knockdown, skip trowel, or smooth), then thin the compound to match the bump size and test it on scrap drywall or cardboard before touching the wall. Feather the new texture 6–12 inches past the patch, let it dry fully, spot-prime, and paint the whole wall so the sheen matches.
Can every wall texture be matched?
Most sprayed textures can be matched closely. Hand-troweled and older textures are harder because they were applied by feel, and a ceiling with popcorn texture may be better removed than patched. Paint age matters too: an old wall can look different from fresh paint even when the texture is right, which is why we paint corner to corner.
When is texture matching worth hiring out?
Ceilings, patches larger than about a square foot, walls in strong side light, and rooms where several repairs sit close together. Those are the spots where a mismatch is easy to see. Cody can look at the wall during a free on-site estimate and tell you whether a patch or a full re-texture makes more sense.
Need Professional Texture Matching?
Texture matching is one of the trickier DIY skills. For large repairs, ceiling work, or quality-critical results, professional drywall finishing ensures invisible repairs.
Book a free texture-matching estimate — pick a time that works for you, no phone tag. Advanced Painting Services provides expert drywall repair and texture matching throughout the Twin Cities, including Shoreview, Roseville, White Bear Lake, and Maplewood. Prefer to talk? Call or text 763-290-2786 for seamless results.
Explore More
Related Articles
You might also like
Wallpaper Removal & Texture Matching: Twin Cities Guide
October 20, 2026
Plan wallpaper removal and wall texture matching in the Twin Cities. Owner-operated help with repairs and repainting. Call Cody: (763) 290-2786.
Twin Cities Home Improvement Tips: Before You Paint
October 20, 2026
Plan a Twin Cities room refresh: check wall cracks, remove wallpaper residue, match texture and measure paint before repainting. Call Cody: (763) 290-2786.
Ready to start your project?
Contact us for a free consultation and estimate for your painting or drywall needs.