
How to Repair Drywall Like a Pro: DIY Guide for Common Wall Damage
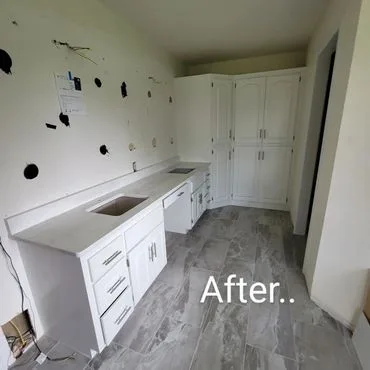
Drywall damage happens in every home—doorknob holes, nail pops, cracks, and dents are inevitable. The good news? Most repairs are manageable DIY projects with the right knowledge and techniques.
Understanding Drywall Damage Types
Small Holes (Nail Holes to 1/2 Inch)
Caused by:
- Picture hangers and nails
- Furniture bumps
- Mounting hardware removal
Medium Holes (1/2 Inch to 4 Inches)
Caused by:
- Doorknob impacts
- Furniture collisions
- Accidental damage
- Failed anchors
Large Holes (Over 4 Inches)
Caused by:
- Major impacts
- Plumbing or electrical access
- Water damage removal
- Structural repairs
Cracks and Seams
Caused by:
- Foundation settling
- Temperature/humidity changes
- Poor original taping
- Building movement
Nail Pops
Caused by:
- Wood framing shrinkage
- Improper fastener installation
- Building settling
Tools and Materials
Basic Repair Kit
- Spackling compound: For small holes
- Setting-type joint compound: For larger repairs (powder you mix)
- Pre-mixed joint compound: For finishing coats
- Fiberglass mesh tape: For cracks and seams
- Patch kits: For medium holes (self-adhesive patches)
- Drywall pieces: For large hole repairs
- Sanding sponge: 120-150 grit
- Putty knives: 1", 4", 6", and 10" blades
- Utility knife: Sharp blades essential
- Drywall screws: 1-1/4" fine thread
- Primer: PVA or shellac-based
Repairing Small Holes
The Process
- Clean the area: Remove loose material, dust
- Apply spackling: Press into hole with finger or putty knife
- Overfill slightly: Compound shrinks as it dries
- Let dry: Usually 1-2 hours for small spots
- Sand smooth: Use fine sanding sponge
- Prime: Seals repair for painting
Pro Tips
- For multiple small holes, work in batches
- Don't over-sand—you'll create depression
- Feather edges blend into surrounding area
Repairing Medium Holes
Self-Adhesive Patch Method
- Clean the hole: Remove loose drywall and debris
- Apply patch: Center over hole, press firmly
- First coat: Apply thin layer of joint compound over entire patch
- Feather edges: Extend compound 2-3" beyond patch edges
- Let dry: 24 hours for setting compound, check pre-mixed instructions
- Second coat: Apply thinner coat, feather further
- Third coat: Light finish coat, feather to 6-8" from center
- Sand between coats: When dry, sand lightly
- Prime: Essential before painting
California Patch Method (For Clean Square Holes)
- Cut drywall piece 2" larger than hole in each direction
- Score back of patch 1" from each edge
- Snap off drywall, leaving paper facing intact
- Apply joint compound around hole edges
- Place patch, pressing paper flaps into compound
- Finish with compound coats as above
Repairing Large Holes
Backing Method
- Square the hole: Cut clean rectangle with utility knife
- Create backing: Cut furring strips or drywall pieces longer than hole width
- Install backing: Insert through hole, screw to existing drywall
- Cut patch: Measure hole, cut drywall 1/8" smaller
- Install patch: Screw to backing boards
- Tape seams: Apply fiberglass mesh tape
- Finish with compound: Multiple thin coats, feathering wide
Studs Available
If hole exposes studs:
- Enlarge hole to center of nearest studs on each side
- Cut drywall patch to fit
- Screw patch directly to studs
- Tape and finish seams
Repairing Cracks
Hairline Cracks
- Widen crack slightly with utility knife (V-shape)
- Apply flexible spackling or elastomeric caulk
- Smooth and let dry
- Sand and prime
Larger Cracks or Recurring Cracks
- Apply fiberglass tape: Directly over crack
- First compound coat: Cover tape completely, press into mesh
- Feather edges: Blend 4-6" on each side
- Additional coats: 2-3 thin coats, wider feathering each time
- Sand and prime: Between coats and before painting
Fixing Nail Pops
- Drive new screws: Place 2" above and below popped nail
- Remove or set nail: Drive below surface or pull out
- Dimple drywall: Screw heads should be just below surface
- Apply compound: Cover all fasteners
- Finish as small hole repair
Matching Texture
Common Textures
- Smooth: Easiest to match—just sand well
- Orange peel: Spray cans available at hardware stores
- Knockdown: Apply texture, let set briefly, flatten with knife
- Popcorn/stipple: Hardest to match—test on cardboard first
Texture Tips
- Practice on cardboard before wall
- Apply to slightly larger area than repair
- Prime repair before texturing
- Multiple light coats better than heavy application
Common DIY Drywall Mistakes
- Too thick coats: Causes cracking, shrinking, long dry times
- Not feathering: Creates visible repair outline
- Skipping prime: Repair absorbs paint differently
- Over-sanding: Creates depressions, damages paper
- Wrong compound type: Use setting compound for thick fills
When to Call Professionals
Some drywall projects need professional expertise:
- Multiple large holes or extensive damage
- Water damage (must address source first)
- Ceiling repairs (difficult positioning)
- Matching complex textures
- Structural crack investigation
Advanced Painting Services handles drywall repair and finishing throughout the Twin Cities. Call 763-290-2786 for estimates.
Explore More
- Drywall Repair Services
- Drywall Repair Near Me
- Interior Painting
- Texturing Services
- View Our Project Gallery
Get a Free Drywall Repair Estimate | Schedule an Appointment
Related Articles
You might also like
Twin Cities Home Improvement Tips: Before You Paint
October 20, 2026
Plan a Twin Cities room refresh: check wall cracks, remove wallpaper residue, match texture and measure paint before repainting. Call Cody: (763) 290-2786.
How to Patch a Hole in the Wall: Step-by-Step Guide with Photos
July 5, 2026
A complete step-by-step guide to patching drywall holes of every size — nail pops, doorknob dents, fist-sized holes, and full drywall replacements. Materials, cure times, and pro texture-matching tips from an experienced Twin Cities drywall professional.
Ready to start your project?
Contact us for a free consultation and estimate for your painting or drywall needs.