
Drywall & Sheetrock Taping and Finishing Guide
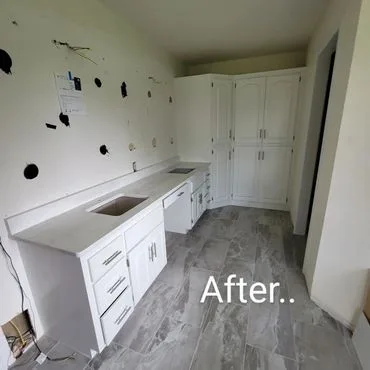
Drywall finishing—taping and mudding seams, often called sheetrock taping and finishing—is what transforms sheets of drywall into smooth, paint-ready walls. It's an art that takes practice, but these professional techniques will help you achieve great results.
Short answer: Drywall finishing takes three coats of joint compound over taped seams, with drying and sanding between each coat.
Not sure you want to mud it yourself? Advanced Painting Services finishes drywall to a true Level 4 or Level 5 across the Twin Cities — owner-operated, fully insured. Get a free drywall finishing estimate or call (763) 290-2786.
What you'll learn
- The six drywall finish levels and which one your walls need
- Exactly which knives, tapes, and compounds to buy (and what to skip)
- Step-by-step taping, fill, finish, and sanding technique
- Drying times, DIY vs. pro cost, and the mistakes that cost the most to fix
Understanding Drywall Finishing Levels
Industry Standard Levels
- Level 0: No finishing (fire blocking only)
- Level 1: Tape embedded in compound (behind tile, concealed areas)
- Level 2: One coat over tape (garage, utility areas)
- Level 3: Two coats, no sanding (texture applications)
- Level 4: Three coats, sanded (standard walls for paint)
- Level 5: Skim coat entire surface (critical lighting, high-gloss paint)
Most residential walls need Level 4. Critical areas with harsh lighting may need Level 5.
Tools and Materials
Essential Tools
- Taping knives: 4", 6", 10", and 12"
- Mud pan: 12" stainless steel
- Corner tools: Inside corner knife, outside corner tool
- Banjo or taping machine: Optional, speeds taping
- Sanding tools: Pole sander, sanding sponge
- Mixing drill: For powder compounds
- Mud stilts or scaffold: For ceiling work
- Work lights: Essential for spotting imperfections
Compounds (Mud)
Setting-Type (Hot Mud):
- Powder you mix with water
- Sets chemically, not by drying
- Available in 20, 45, 90, 210 minute set times
- Best for: embedding tape, filling gaps, building thickness
Pre-Mixed All-Purpose:
- Ready to use from bucket
- Dries by evaporation
- Easier to sand
- Best for: finish coats, skim coating
Lightweight Pre-Mixed:
- Easier to sand than regular
- Less shrinkage
- Best for: final coats
Tape Types
- Paper tape: Standard choice, strongest, takes practice
- Fiberglass mesh: Self-adhesive, easier for beginners, use with setting compound
- Metal corner bead: For outside corners
- Paper-faced metal bead: Combines strength with tape
Step 1: First Coat (Taping)
Flat Seams
- Apply bed coat: Load 6" knife with compound, apply 4" band over seam
- Embed tape: Center tape over seam, press lightly into compound
- First wipe: Run knife over tape with medium pressure, squeezing out excess
- Thin cover coat: Apply thin layer of mud over tape
- Clean up edges: Remove excess compound from outside edges
Butt Joints (Non-Tapered Ends)
These are harder because there's no recess:
- Apply compound and tape same as flat seams
- Keep coats as thin as possible
- Plan to feather very wide (16-24") to hide the bump
Inside Corners
- Apply compound to both sides of corner
- Fold paper tape in half (pre-creased)
- Press tape into corner with fingers
- Run corner knife or fold 6" knife to smooth both sides
- Let dry, then coat each side separately in alternating sessions
Outside Corners
- Attach corner bead with screws or crimper
- Apply compound to one side, covering bead edge
- Smooth from wall toward corner
- Repeat on other side
- Coat sides alternately to build smoothly
Step 2: Second Coat (Fill Coat)
Purpose
Fill coat hides the tape and begins creating smooth, feathered edges.
Technique
- Light sand or knock down any ridges from first coat
- Apply compound with 8" or 10" knife
- Feather edges 2-3" beyond first coat
- Keep coats thin: 1/16" maximum
- Focus on filling: Eliminate tape visibility
Tips
- Work in one direction
- Use long, even strokes
- Don't overwork—more coats are better than thick coats
- Check with sidelighting between coats
Step 3: Third Coat (Finish Coat)
Purpose
Final smoothing and feathering for invisible seams.
Technique
- Sand lightly after second coat dries completely
- Apply thin final coat with 10" or 12" knife
- Feather extensively: 2-3" beyond previous coat
- Focus on smoothness: Long, even strokes
- Reduce compound: Thinner than previous coats
Quality Check
- Use work light at sharp angle to wall
- Mark imperfections with pencil
- Touch up as needed
- Final sand when completely dry
Step 4: Sanding
When to Sand
- Only when compound is completely dry
- Touch to check—should feel room temperature
- Usually 24 hours for pre-mixed, varies for setting types
Sanding Technique
- Use pole sander for large areas
- 120-150 grit for general sanding
- Light pressure: Let sandpaper do the work
- Circular motions blend edges
- Check with sidelight frequently
- Don't over-sand: Exposes tape or paper
Dust Control
- Seal room with plastic sheeting
- Use drywall sanding screens (less clogging)
- Consider drywall vacuum sander
- Wear N95 mask
- Clean thoroughly before priming
Common Finishing Mistakes
Taping Errors
- Dry tape: Not enough compound under tape causes bubbles
- Too much compound: Creates ridges and shrinkage
- Tape overlap: Shows through finish
- Poor corner fold: Creates wrinkles
Mudding Errors
- Thick coats: Shrink, crack, take forever to dry
- Not feathering: Creates visible seam lines
- Overworking: Roughens surface
- Stopping mid-seam: Creates overlaps
Sanding Errors
- Sanding too soon: Tears wet compound
- Over-sanding: Exposes tape, fuzzes paper
- Skipping grits: Leaves scratches
- Not checking with light: Misses imperfections
Level 5 Finish (When Needed)
When to Use
- Walls with harsh or critical lighting
- High-gloss or semi-gloss paint
- Dark colors that show imperfections
- Highest quality expectations
How to Apply
- Complete Level 4 finish
- Prime entire surface
- Apply thin skim coat of compound to entire surface
- Sand smooth when dry
- Prime again before painting
Drying Times Between Coats
| Compound | Typical dry/set time | Notes |
|---|---|---|
| Setting-type (hot mud) 20/45/90 min | Sets in the stated time, sand after 2–4 hrs | Best for first coat and gaps; hard to sand |
| Pre-mixed all-purpose | 12–24 hours per coat | Slower in cold or humid basements |
| Lightweight pre-mixed | 8–16 hours per coat | Easiest sanding, use for the final coat |
In Minnesota, an unheated basement or a winter garage can double these times. Keep the room above 55°F with air moving, and never coat over compound that still feels cool to the touch.
DIY vs. Professional Drywall Finishing Cost
Every project is priced after a free on-site estimate — Cody walks the job, then gives you a written scope and price before any work starts.
| DIY | Professional (Twin Cities) | |
|---|---|---|
| Time to paint-ready | 3–4 days | 1–2 days |
| Level 5 skim coat | Difficult to achieve | Add roughly 30–50% |
DIY makes sense for a closet, a garage, or a utility room. Once the wall is large, tall, in critical light, or headed for a dark or semi-gloss color, the finish quality gap gets expensive to correct after paint is on.
When to Call a Professional
- Ceilings, stairwells, or anything above 10 feet
- Rooms with big windows or wall-washing lights (Level 5 territory)
- Water-damaged or moldy drywall that needs replacement first
- Matching existing texture — orange peel, knockdown, or skip trowel
- Any job where you need it painted and done this week
Schedule a free drywall estimate — we serve Shoreview, Woodbury, Stillwater, Cottage Grove, and the wider Twin Cities metro.
Drywall Finishing FAQs
How many coats of mud does drywall need?
Three coats for a standard Level 4 finish: a tape (bed) coat, a fill coat, and a thin finish coat. A Level 5 finish adds a skim coat over the entire surface, for four total.
How long should mud dry between coats?
Pre-mixed compound needs 12–24 hours per coat; setting-type compound can be recoated once it hardens, often within a few hours. Compound that still feels cool is still wet — coating over it causes cracking and shrinkage.
Is mesh tape or paper tape better?
Paper tape is stronger and is the standard for flat seams and inside corners. Self-adhesive mesh tape is more forgiving for beginners and for patches, but it must be used with setting-type compound for the first coat.
Do I need to sand between every coat of drywall mud?
You don't need a full sanding between coats — knock down ridges and lines with a blade or a light pass of 150-grit. Save the real sanding for after the final coat so you don't dig into the tape.
How much does drywall finishing cost in the Twin Cities?
Every project is priced after a free on-site estimate — Cody walks the job, then gives you a written scope and price before any work starts.
Level 5 skim coating adds roughly 30–50%. Estimates are free.
Do I have to prime before painting new drywall?
Yes. Bare joint compound and drywall paper absorb paint at different rates, so skipping primer leaves visible flashing at every seam. Use a dedicated PVA drywall primer on new work.
Can I texture instead of finishing to Level 4?
Yes — orange peel or knockdown texture hides minor imperfections, so a Level 3 finish is acceptable underneath. Smooth walls, gloss paint, and dark colors still need Level 4 or 5.
Why do my drywall seams show after painting?
Almost always feathering that stopped too soon, or a coat applied too thick. Widen the feather to 12–24 inches on butt joints, check with a work light held flat against the wall, and re-prime any area you re-mud.
Professional Results Take Practice
Drywall finishing is a skill developed over time. Small projects are great for learning. For larger jobs or quality-critical areas, professional finishing ensures the results you expect.
Advanced Painting Services provides expert drywall finishing throughout the Twin Cities. Call 763-290-2786 for quality you can see.
Explore More
- Drywall Repair Services
- Drywall Repair Near Me
- Interior Painting
- Texturing Services
- View Our Project Gallery
Get a Free Drywall Repair Estimate | Schedule an Appointment
Related Services
Related Articles
You might also like
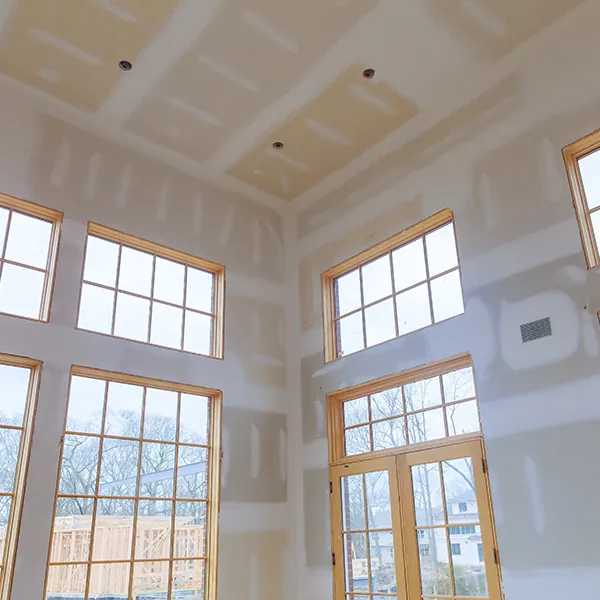
Professional Drywall Finishing vs. DIY: When Mudding Drywall Yourself Costs More
July 20, 2026
Mudding drywall looks simple on YouTube — three coats and sand, right? Here's what a Level 5 finish actually takes, where DIY mudding goes wrong, and when hiring a Twin Cities pro is the cheaper move.
Ceiling Texture Options for Your Minnesota Home: From Knockdown to Smooth
April 21, 2025
Explore the most popular ceiling texture options for Minnesota homes, including pros and cons of each style, costs, and which textures work best in different rooms.
Ready to start your project?
Contact us for a free consultation and estimate for your painting or drywall needs.