
Professional Drywall Finishing vs. DIY: When Mudding Drywall Yourself Costs More
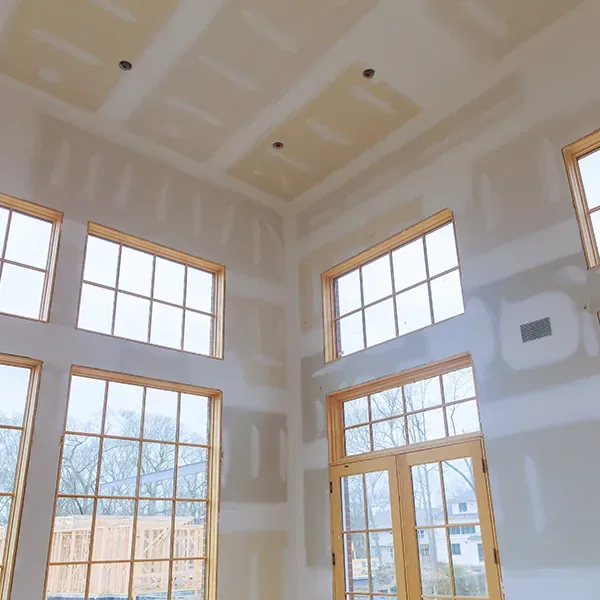
Mudding drywall looks deceptively easy on YouTube: butter on some joint compound, sand, repeat. In reality, a seamless finish is one of the most technically demanding skills in the trades — and it's the reason freshly painted DIY walls often reveal every joint, screw, and lap mark the moment sunlight hits them.
As a Twin Cities drywall specialist, Cody gets called in to fix DIY mudding jobs almost every week. This guide walks through what professional drywall finishing actually involves, where DIY mudding drywall usually goes wrong, and how to decide when it's worth hiring a pro.
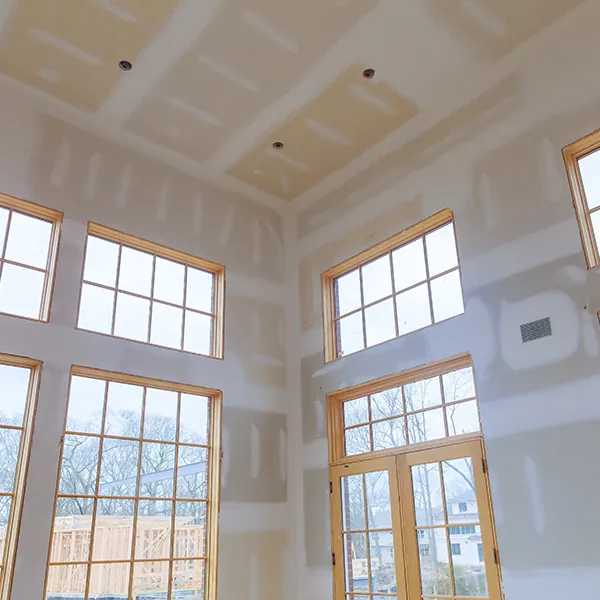
What "drywall finishing" actually means
Drywall finishing is everything that happens after the sheets are hung: taping seams, coating screw heads, feathering joints, sanding flat, and matching texture. The industry rates the result on a Level 0–5 finish scale set by the Gypsum Association:
| Level | Description | Where it's used |
|---|---|---|
| Level 0 | No taping or finishing | Temporary construction |
| Level 1 | Tape embedded only | Above ceilings, plenums |
| Level 2 | One coat over tape and screws | Garages, storage |
| Level 3 | Two coats — for heavy texture | Knockdown, orange peel walls |
| Level 4 | Three coats, sanded smooth | Standard flat/eggshell paint |
| Level 5 | Skim coat over the entire surface | Gloss paint, raking light, high-end finishes |
Most Twin Cities living spaces need Level 4 at minimum. Any wall lit by a large window, a sconce, or a satin/semi-gloss paint really wants Level 5 — otherwise every taping imperfection telegraphs through the paint.
Why mudding drywall is harder than it looks
Joint compound doesn't just fill a seam; it has to disappear into the surrounding paper face. That requires three things DIYers rarely have all at once:
- Feel for the mud. Consistency shifts with humidity, temperature, and how long the bucket's been open. Pros thin, retemper, and read the mud constantly.
- Blade control across a 10–12" knife. A wobble the width of a pencil lead leaves a ridge you'll see for the life of the wall.
- Feathered transitions 12–18" wide per side. Amateur joints are too narrow, which creates the classic "hump" you see under raking light.
Add Minnesota's low winter humidity (often under 15%) and joint compound dries faster than DIYers can work it — leading to lap marks, pinholes, and cracked seams by spring.
The professional 5-step drywall finishing process
Here's the process Cody follows on every job — and what most DIY tutorials skip.
1. Prep and inspection
We check every screw for proper depth (dimpled, not blown through the paper), reset any that sit proud, and cut back torn face paper. Torn paper under mud is the #1 cause of bubbling tape.
2. Tape coat
Paper tape is embedded into a thin bed of all-purpose compound with a 6" knife. Mesh tape is faster but weaker — we only use it on small patches or where a setting-type compound is needed.
3. Fill coat (second coat)
Using a 10" knife and all-purpose or topping compound, we build the joint out wide, feathering 8–10" per side and filling every fastener a second time.
4. Skim coat (third coat)
A 12" knife lays down a thin, wide finish coat — feathered 12–18" per side. This is where a joint becomes invisible. On Level 5 work, we follow with a full-surface skim using a diluted compound or roll-and-knockdown method.
5. Sanding and pole-lighting
We sand with 220-grit on a pole sander, then walk every wall with a raking work light held flat against the surface. Any shadow-sm gets re-coated and re-sanded. Painters call this a "primer-ready wall."
Where DIY mudding drywall usually goes wrong
The DIY jobs we get called in to fix almost always show the same handful of issues:
- Joints too narrow. Feathered 4–6" instead of 12–18", so every seam is a visible bump.
- Screws under-filled. Single-coated screws leave dozens of tiny divots that only appear once paint is on.
- Sanding through the tape. Aggressive sanding cuts into the tape, causing cracks and bubbles within a season.
- Skipping the third coat. Two coats never fully hides tape edges — you get ghost lines under any sheen.
- No raking-light check. DIYers judge the wall under overhead light and miss defects that scream under window light.
- Painting straight over unprimed mud. Fresh mud flashes badly through paint without a proper drywall primer/sealer.
Fixing these usually costs more than doing the finishing right the first time, because we have to sand back the failed work before we can re-mud.
Professional vs. DIY: real cost comparison (Twin Cities)
Every project is priced after a free on-site estimate — Cody walks the job, then gives you a written scope and price before any work starts.
| Item | DIY | Professional |
|---|---|---|
| Time for a 12x14 room (3 coats + sand) | 3–5 weekends | 2–3 days |
| Level 4 finish quality | Inconsistent | Consistent |
| Level 5 skim coat capability | Rarely | Standard |
| Dust containment | Whole-house dust | Contained zones + HEPA |
| Warranty on workmanship | None | Yes |
When DIY mudding drywall actually makes sense
We're not going to pretend every drywall job needs a pro. DIY is a fair call when:
- You're finishing a utility space (garage, mechanical room, storage) that only needs Level 2.
- You're patching a single small hole in a low-light area (see our step-by-step patching guide).
- The wall will be covered in heavy knockdown texture that hides imperfections.
- You have realistic time and are willing to accept a "handyman-grade" finish.
Where DIY almost always disappoints:
- Whole-room finishing — especially open-concept great rooms with lots of natural light.
- Ceilings — gravity, awkward angles, and raking light make ceilings unforgiving.
- Level 5 finishes for gloss or semi-gloss paint.
- Water-damage or insurance repairs where documented, warrantied work matters.
- Texture matching to existing knockdown, orange peel, or skip trowel.
Minnesota-specific challenges that make DIY harder
Twin Cities homes put extra stress on drywall finishing that most tutorials never mention:
- Low winter humidity (10–20%) makes joint compound flash-dry and crack.
- Foundation movement from 60–80 annual freeze-thaw cycles opens hairline seam cracks — professional tape jobs resist this far better than mesh-tape DIY repairs.
- Ice-dam water damage in ceilings needs stain-blocking primer plus a re-finish, not just a mud patch.
- Older plaster + drywall combos in St. Paul and Minneapolis bungalows require blended finishing techniques most DIYers have never done.
Why hire Advanced Painting Services for drywall finishing
Cody estimates every project, is on site for the work, and completes the final walkthrough — including whole-home and commercial projects. Never subcontracted.
- Level 4 standard, Level 5 available — including full-surface skim coats for gloss paint or dramatic lighting.
- Perfect texture matching — knockdown, orange peel, skip trowel, and smooth.
- HEPA dust containment so the rest of your home stays clean.
- Prime and paint in one visit — no juggling multiple contractors.
- Fully insured, warranty-backed work.
We serve the full Twin Cities metro, including Shoreview, Roseville, White Bear Lake, Vadnais Heights, and Arden Hills.
Frequently asked questions
How many coats of mud does drywall finishing really need?
Three coats for a standard Level 4 finish: tape coat, fill coat, and skim coat. Level 5 adds a full-surface skim over the entire wall. Anything less will show through paint.
How long between coats of drywall mud?
All-purpose compound needs 12–24 hours between coats in normal humidity — longer in Minnesota winters when dry air makes the surface dry faster than the interior. Setting-type "hot mud" recoats in 30–90 minutes but is much harder to sand.
Can you paint directly over new drywall mud?
No — always prime with a dedicated drywall primer/sealer (PVA or high-build). Painting straight over mud causes flashing, where the mudded areas look glossier or duller than the surrounding paper face.
What's the difference between mudding drywall and skim coating?
Mudding usually refers to filling joints and fasteners (Level 4). Skim coating is applying a thin layer of compound across the entire wall surface (Level 5) to hide texture, patches, or old wallpaper glue.
How much does professional drywall finishing cost in the Twin Cities?
Every project is priced after a free on-site estimate — Cody walks the job, then gives you a written scope and price before any work starts. See our drywall repair pricing guide for detail.
Is it worth hiring a pro just for finishing if I hung the drywall myself?
Yes — this is one of the most common calls we take. Finishing is where the wall is made or broken, and we can tape, coat, sand, and prime a room in 2–3 days versus the 3–5 weekends most DIYers spend.
Explore More
- Drywall Repair Services
- Drywall Installation
- Drywall Repair in the Twin Cities
- How to Patch a Hole in the Wall (DIY Guide)
- Interior Painting Services
Get a Free Drywall Finishing Estimate | Call (763) 290-2786
Related Articles
You might also like
Drywall Repair in the Twin Cities: 20 Homeowner Questions Answered
August 26, 2026
Twenty straight answers about drywall repair in the Twin Cities — ceiling cracks, ice dam stains, texture matching, timelines, insurance, and when a patch is not enough.
Drywall Repair Cost in the Twin Cities: 2026 Pricing by Job Type
August 14, 2026
Nail pops, water stains, ceiling cracks, and full sheet replacement — what each drywall repair actually costs in the Twin Cities in 2026, and which ones you can safely DIY.
Ready to start your project?
Contact us for a free consultation and estimate for your painting or drywall needs.